
After the launch of the sequel, there was a question that attracted a lot of attention from many players: What changes did ftk 2 bring to ftk, and were these changes what players wanted?
This article will be based on my experience of 800 hours of ftk and 180 hours of ftk 2, I’ll give an in-depth and comprehensive analysis of all aspects of the game.
Note: In the following paragraphs, IOG refers to the studio that developed the game, ironoak games.
Director
Characters – Weed through the old and bring forth the new, but still can improve a lot
Landout — It’s starting to take shape, but more items don’t necessarily make it more fun
Equipment system – lack of novelty, needs to be further polished, optimized and innovated
Differences in gameplay – see the subtle knowledge, there are changes, but the overall feeling is not optimistic
Characters – Weed through the old and bring forth the new, but still can improve a lot
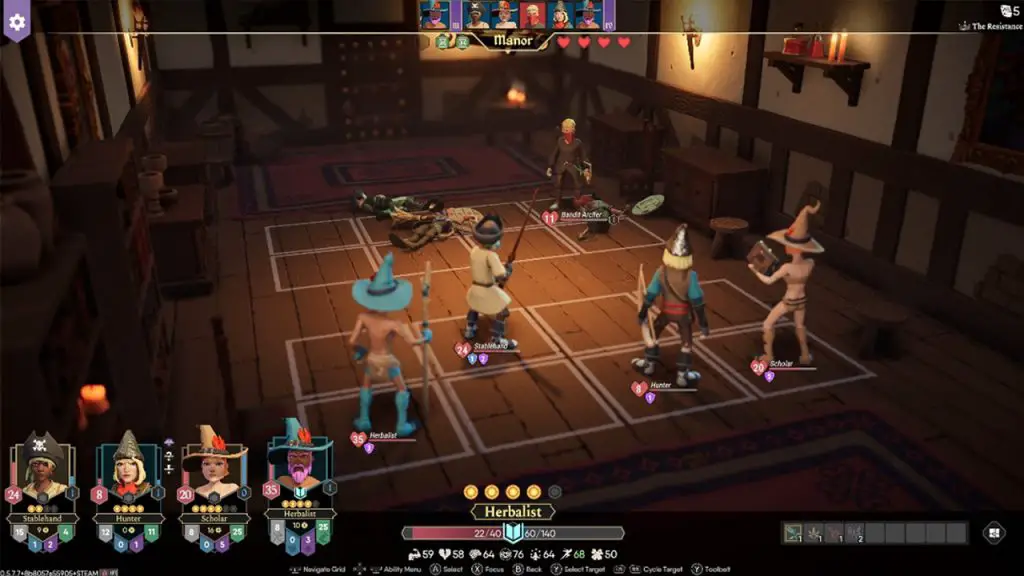
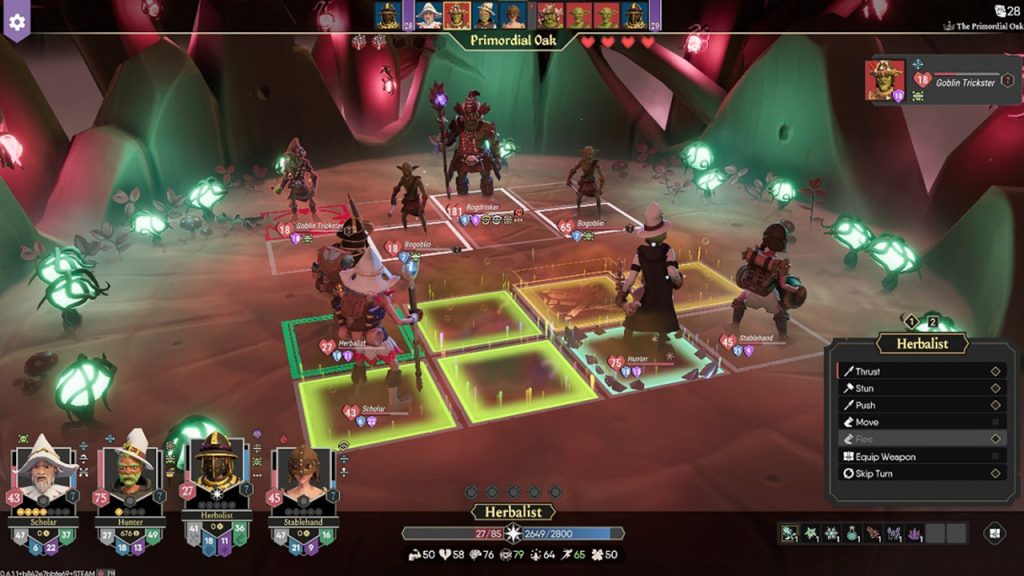
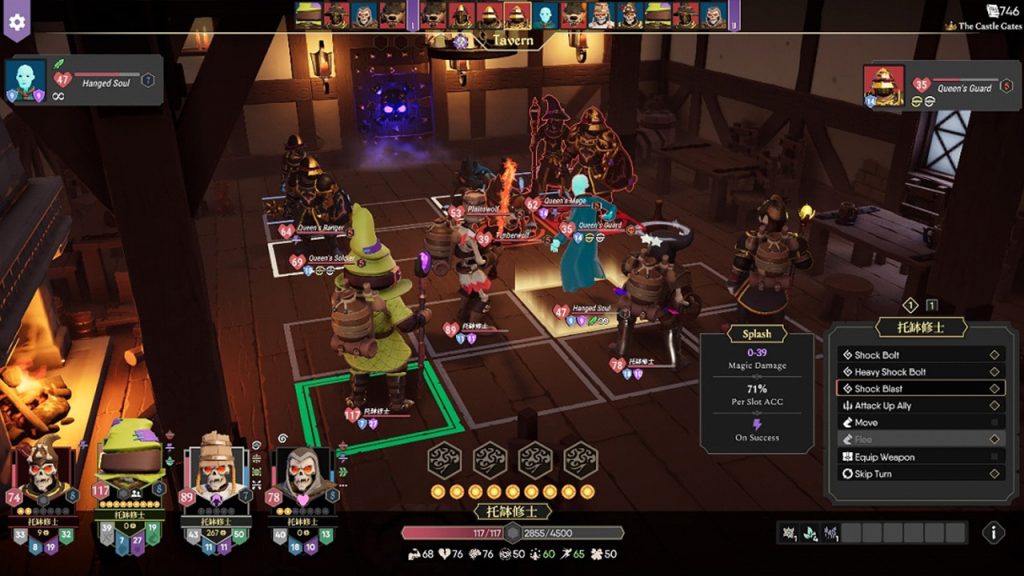
There are a total of twelve characters in ftk 2, half old and half new. Due to the characteristics of ftk 2, scholar, hunter, and blacksmith are still the iron triangle on the propaganda map. In addition, herbalist, hobo, and woodcutter have been carefully selected by IOG to join the Resistance team. The passive skills of the old characters have not changed, so the passive skills of the new characters have become one of the highlights of the game: The addition of the stablehand successfully replaced the dominance of the gladiators from the previous game, as a power-based character, their extremely high speed and excellent passive skill, makes it easy for them to fulfil the role of main physical damage dealer, and with the new mechanics of ftk 2, a new strategy of infinite turns came into being (pioneered by a Chinese player, 七神炎舞): With the special ability of the calm pipe, you can get a continuous supply of focus by smoking any herb, and then, by spending all your focus on a primary action — the Hard Work passive skill is triggered allowing for an extra primary action, allowing for an almost endless row of attacks, this also puts it on par with one of ftk other golden strategies, the group charge, making it the best strategy for maximizing team damage while eliminating enemies before they get a turn.
The Farmer and the Woodcutter are the other strength characters; however, their passive skills are slightly inferior to the Stablehand. The Woodcutter’s justice can also maximize physical damage, but the confusing proc probabilities in Ftk2 may make some players wonder if this character’s passive skill even exists to begin with (the skill requires them to wield a two-handed weapon). The Farmer’s passive ability, Scarecrow, summons a scarecrow on a frontline tile that acts as a shield that can last up to five turns, making it a great option for protecting back-row characters or players who like to play tank-type characters. Both characters have their strengths and weaknesses, but they maintain a trait from ftk in their disadvantages: slow speed. Slow speed was a very fatal blow when exploring the map, it also prevented them from taking a place in my list of favorite characters.
The Friar is another tank-type character with a toughness comparable to that of the Blacksmith, he has three passive skills related to brewing. Although the Friar can pass the positive effects of different brews to their teammates, they can also greatly increase the chance of being destroyed by the enemy, since that, despite the Friar themselves being immune to negative brew effects, their teammates are not, which can cause the whole team to be stunned or confused.
The Alchemist is highly connected with a new item in ftk 2, the Bomb, making it a powerful character with increased additional damage. The bombs are a replacement for the orbs from ftk, providing the possibility deal additional damage to enemies, as well as negative effects, while being able to be used in the same turn as your main attack. However, because the negative effects are still not fully perfected, the poison bomb and acid bomb have no obvious negative effects on the enemies. As a new mage-type character with both high speed and novelty, the alchemist’s probability of finding a bomb is still greatly reduced by the confusing trigger probability in ftk 2.
Shepherd’s herding is one of the most controversial skills on the list of passive skills unique to ftk 2, the already low probability of summoning sheep is exacerbated by the extremely low damage resistance of the sheep itself. The skill also has a probability of summoning a wolf, the wolf’s damage, and ability to defend from damage are much higher than those of sheep, the only drawback is that it has an extremely low probability to trigger being very dependent on the player’s luck. Passive abilities aside, a good awareness weapon makes the Shepherd still useful, so the character’s poor performance should be attributed more to a design mishap.
If the talent weapons can keep up sooner, the role of Pathfinder can be comparable to the one of the stablehand. The basic attributes of both high awareness and talent, combined with the most important passive skill for map exploration in ftk 2 – survey, Pathfinder has received positive feedback from the players. Finding the Hero Monument and Shrine to upgrade and restore your character, revealing the location of mini-dungeons and towns to speed up the game, is made easier, all thanks to the Pathfinder. Its not-so-low speed, combined with his talent, has also earned Pathfinder a place at the top of the character rankings.
Landout — It’s starting to take shape, but more items don’t make it more fun
This part is exclusive to ftk 2, IOG has put a lot of effort into the design of the system, but unfortunately there are few good loadouts and many useless options in the selection of initial items. Loadout Points is a system that provides players with a variety of starting items, each with a fixed price of points, players can decide which items to choose according to their needs.
The items can be categorized by herbs, weapons, equipment, and others, and each category contains different point prices; for example: equipment varies between 2-4 points in price, while money bags vary between 1-3 points. The number of items available can be increased in the Lore Shop by purchasing them with lore, and unlocking more initial weapons and equipment is also dependent on the Lore Shop. Once you have mastered the basic rules, the most important item selection is the following:
- Herbs — Feel free to take them on Apprentice difficulty, but on journeyman and master difficulties these are optional; fire silk will cost more than you can budget due to the price of four points
- Equipment (including rings, shields, clothes, shoes, gloves) — casual on Apprentice difficulty, they are not cost-effective on Journeyman and Master difficulties; Weapons — Feel free to take them on Apprentice difficulty, only the Fire Axe and Six-Foot pole are recommended on Journeyman and Master difficulties
- Miscellaneous — Feel free to take them on Apprentice difficulty, only lock picks and carnival tickets are recommended for journeyman and master difficulty.
Required: Money bag, the more the merrier (more options at the beginning)
The addition of talents greatly increases the variety of the gameplay and increases the possibility of different combinations. The choice of talents will affect the direction of the game, which is not only aligned with the player’s strategy, but also a test of the player’s experience and luck.
- Gifted: All stat bonuses, useful to all characters
- Lucky: Luck bonus, useful to all characters
- Eager: Has a certain chance of attacking first, suitable for low-speed characters (speed below 65)
- Tactician: Has a chance to trigger a damage bonus on a random tile, useful to all characters
- Deep thinker: Level-ups restore all focus, suitable for mage-type characters with a high focus capacity
- Navigator: Complements the Pathfinder’s survey, but the talent is more useful in Chapters 4 and 5 than in the first three chapters, useful to all characters
- Nimble: Adds an additional secondary round that provides additional secondary action for bomb-throwing, loading, and party healing, useful to all characters
- Support: Increases the range of characters participating in battles on the map
After many rounds of playing, here are the best matches for my team:
Stablehand —nimble, avoids the problem of not being able to take herbs to restore their health after the cannon is loaded
Pathfinder —navigator, increases movement efficiency to speed up the mapping process
Herbalist — gifted or deep thinker, reduces the weapon’s failure chance per roll or expands the Focus pool to ensure accuracy
Alchemist — Gifted or deep thinker, reduces the weapon’s failure rate per roll or expands the Focus pool to ensure accuracy
My personal favorite team is made up of these four characters. They perform their duties, main damage dealer + auxiliary damage + rapid map revealing + party healing.
Equipment system – lack of novelty, need to be further polished, optimized and innovated
Ftk 2 inherited a large number of weapons from ftk, but the weapons have the problem of being significantly weaker and have insufficient damage, which are analyzed one by one based on different attributes:
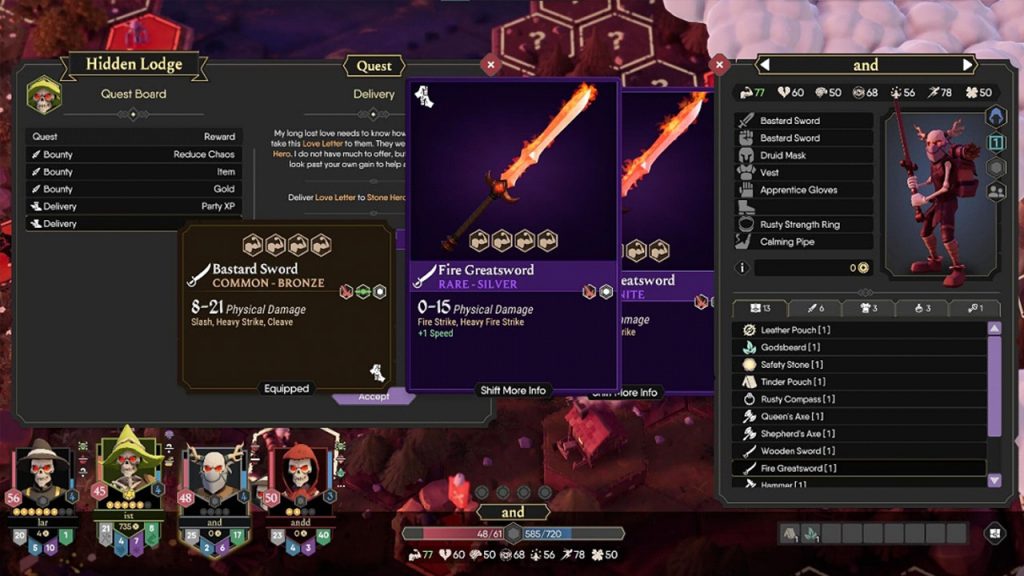
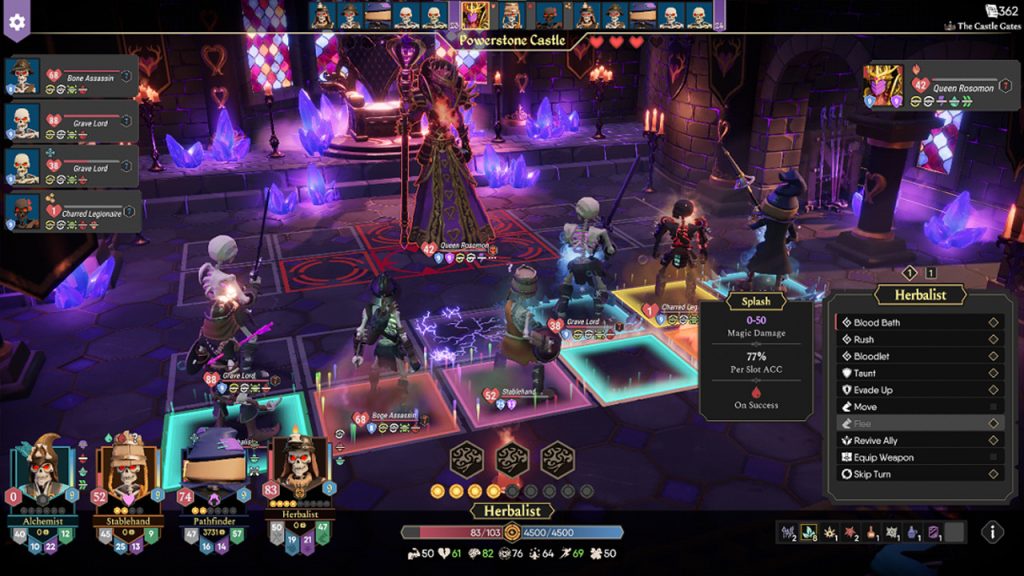
- Intelligence — Mage weapons are varied but generally distinct in ftk 2, with the Staff responsible for individual damage and group attacks, the wand for ignoring magic resistance and support, and the spellbook for AoE attacks and support. Among the three types of magic weapons, they can be divided into thunder, fire, frost, normal, bleeding and queen, according to different attributes. Weapons with different attributes have no obvious design shortcomings and are one of the types of weapons that are easy to use, they also appear frequently. Among them, the Dark tome has subverted the entire game’s combat system, summon skeletons, a support skill that can make players invincible by allowing them to unleash an endless horde of undead on their enemies, making it stand out amongst all other weapon types, and is therefore crowned by players as the strongest weapon in ftk 2.
- Strength — There are a lot of one-handed physical weapons in ftk 2, but due to numerical issues, none of them can defeat the heavy weight champion in this game, the cannon. The cannon has a total of four levels of damage, with a minimum of 16 and a maximum of 40. This damage range is sufficient for most enemies, and the cannon has splash damage, so it’s a well-balanced power weapon with the highest killing efficiency. Axes are available in one-handed and two-handed versions, although the Queen’s Axe is a one-handed weapon, its exclusive armor drop debuff ability also gives this weapon a place in this fierce competition. As the second-highest physical damage weapon, the two-handed axe requires a five-roll skill check, but if the strength stat is high enough (80 and above), then it can also be used consistently. All in all, the damage ceiling has appeared, but the different damage tiers still require more stat fill and damage balancing.
- Awareness — As the weakest weapon type in ftk, this type has arguably received a lot more attention in ftk 2. It appears more frequently in several weapon types, meaning that awareness is the easiest attribute to work with. In terms of damage, whether it is a spear or a bow, it has a good damage output, giving it a lot more versatility and allowing it to fulfill a better support weapon role. Although statistically inferior to intelligence weapons, the four status effects of Imprisonment, Fire, Freeze, and Chaos have demonstrated the potential of these weapons. Unfortunately, most of the current awareness weapons that inflict status effects are bows, and most of them deal physical damage, so it is easy to have a predicament, where three characters are dealing physical damage and only one is dealing magic damage. The appearance of the new awareness weapon families did not help much to improve its status, and the cane, with its ability to move enemies around, had a very limited impact on the enemy’s movement in battle.
- Luck — Currently, the Luck talent only supports one type of weapon: the toy Hammer. The toy Hammer only has two variants, 10 damage and 20 damage. Although a lot of luck bonus equipment is easy to obtain (luck can easily stack to 95), weapons are very limited. The Night Market is still the best way to buy more powerful weapons in ftk2, but finding a toy Hammer among the many weapons is still like looking for a needle in a haystack. In the closed beta existed type of bomb that was determined by luck, but with the full release of the game, that type of bomb was removed by IOG, so the luck weapon family is in urgent need of new blood.
In addition, the number of clothes, rings, gloves, shoes and hats is as high as 2000+, so there are still a large number of names and models shared in the items, and the difference in materials also brings a lot of pressure to the subsequent adjustments, the confusion in rarity deducts a lot of points for the player’s first experience to a certain extent. The unique gameplay of corresponding the stat bonuses corresponding to each character was also buried in ftk 2 due to the large amount of equipment, making ftk 2 a simple cool game that heavily relies on stacking bonus damage from equipment, and there is still a huge gap in the diversity of strategies.
Differences in gameplay – see the subtle knowledge, there are changes, but the overall feeling is not optimistic
There are five chapters in ftk 2, each with three gem challenges and secret rooms to complete and discover. All five chapters are progressively unlocked by clearing the previous chapter, preventing players from skipping any chapters. Let’s break it down in chapter order:
Chapter 1 – The unique three-stage chaos forms the basic time limit of the chapter, and the chaos in the first stage is irreversible, which requires the player’s time mastery ability on both journeyman and master difficulty. However, the four empty slots mean that even on Master difficulty, players have 15 turns to explore the first area, the Autumn Forest. Compared to the 12 rounds of extreme control in the closed beta, the difficulty of the Novice Village has been reduced. The most criticized side quest system in the Novice Village is the first problem that new players face: How to choose to maximize the benefits while minimizing risks? Side quests are divided into four main categories, which are:
1. Kill the enemy. Rewards equipment or gold for killing enemies
2. Send the item. Includes gold coins, group XP or items for sending 1 item from one place to another
3. Secret missions. Contains Hidden Dungeons, Hidden Keys, or Hidden Boosts
4. Chaos Mission. Appears only in the first two chapters
Judging the risk of a task like killing an enemy requires a certain amount of experience with the type of enemy and the damage it takes to kill them, so it is not recommended that players who are not familiar with ftk 2 blindly choose this type of mission for the sake of a weapon or equipment in the first place. Enemies you need to kill will be in a camp and usually one level higher than the player’s team, so it’s important to make preparations to take them on. Large enemy missions such as Trolls, Jellies, and Bomers reward the most gold, but also have the highest probability of heavy losses.
Sending objects is a lot less risky than killing enemies, but it takes more time. The target location is usually a certain distance away from the town, so balancing travel time with leveling up efficiency is another challenge for new players. It is best to have a teleportation scroll or a return to the city scroll, and if you don’t have one, it is recommended to leave it to the fastest character to complete to divide the work more efficiently. Due to the larger maps, taking these quests is one of the new tricks to quickly find the Hero Statue or Shrine. Secret quests only appear in Chapters 2, 3, and 5, and are hidden in a ????? format in the quest list, and once players accept the quest, there is only one way to reveal the quest’s rewards. For example, the hidden spider cave in Chapter 2 has a direct reward – the Bone Pipe, but the real reward behind it is unlocking the Ice Hammer Family, and Chapter 5 has the highest number of secret missions in all chapters, mainly to reduce the difficulty of the first four battles in the final dungeon.
The Chaos quest is one of the links between the two games quest systems, and it is also the most important side quest in ftk and its dungeons. However, the chaos reduction mission, which was so important in ftk, became less important in ftk 2 due to changes in gameplay. Due to the larger map, the range of exploration is more limited depending on the time constraints, so it is more efficient to speed up the main quest than to drag out the time to fight the enemies in a certain phase.
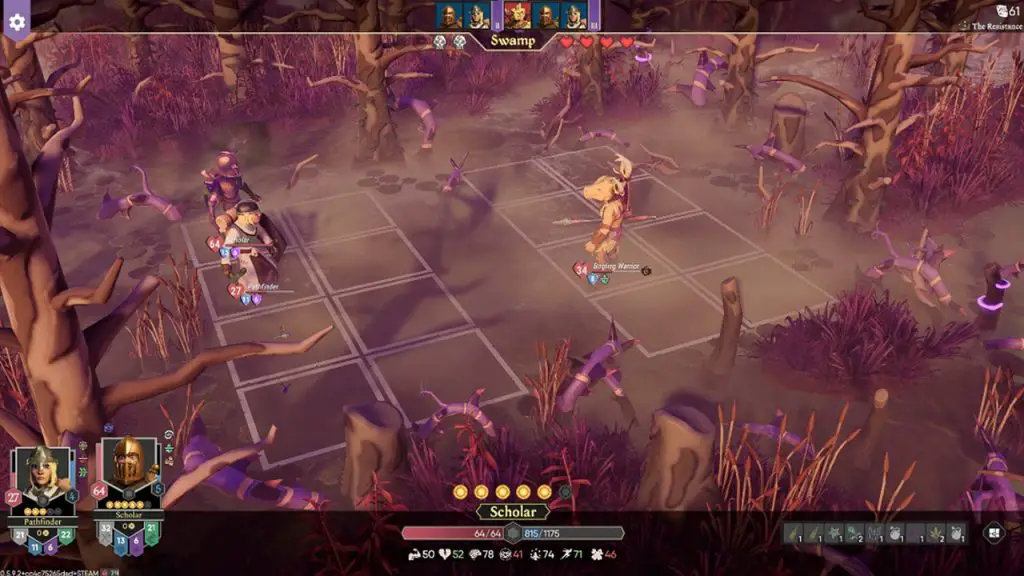
In these three stages of Chaos, the middle section not only has two large landscapes and the Queen’s Guard chase that will force the whole team into defense, but also affects whether the three gem challenges can be successfully completed, so it needs to be paid attention to. Three reinforcement barracks in the savannah and one in the foothills can effectively delay the arrival of the Queen’s Guard, giving players plenty of time to lvl up and gather gear. The savannah in the first chapter is a reference to the distribution of enemies in the Golden Plains in ftk, that is, trying to fight a single enemy can get multiple enemies in its proximity involved, sometimes as many as eight enemies.
With such a dense distribution of enemies, players have only two options: either keep ambushing and reduce the number of enemies or avoid certain battles. The best strategy to maximize gains while minimizing risk is to gain enough gold and experience by fighting camps, so finding the only mini-dungeon of the two landscapes is an essential step. This strategy has been taking shape since ftk, and players will need to travel to as many terrains as possible and clear the corresponding mini-dungeons as quickly as possible in the second phase of the main quest in For the King,
in order to reach level 4 as soon as possible and meet the conditions for the Chaos camp before the next town to refresh. The difference is that in ftk, chaos devices were relied upon to delay chaos and gain ample time to wander around looking for targets to attack, once they had enough time to do so, they could explore the entire map, or go deep into sea caves to get pearls, or engage different enemy ships at sea, or have difficulty walking through the mud of swamps, or look out at the ocean in the distance on the golden plains. The players will not have a chance to relive this free-style exploration until the fourth chapter in ftk 2. Therefore, the first two stages of the first chapter can be said to be used as an introduction to the player of this more restricting exploration style.

In the later adventures, the player will need to choose between the cellar and the sewers: the cellar will have a mercenary named Pine Cone join the player’s team to fight with the player, which will be less difficult than the sewers, but you will miss the opportunity to enter the secret room later on, and there are many witches, vipers, spiders and rats in the sewers, the proportion of enemies with high magic resistance is higher, so characters with high physical damage in the team are especially important. (In the sewers, you can buy the key to the secret room for 100 gold)
When the player exits the dungeon, the two choices will correspond to two routes. The sewer exit is in a swamp, and the swamp terrain has a step debuff, so each character can take a maximum of four steps without a step bonus. If it rains, it will be even less at a 1 step minimum. This is a challenge for the player’s fast-moving strategy, if the player chooses to go straight to the main dungeon, Boogie’s Crypt, due to this slow movement, their herb inventory will be put to the test. Although the enemies that follow have been adjusted in many rounds, they still have a lot of power, and you need to pay attention to your HP at all times.
After completing the dungeon and trekking to an arena to defeat Jeremy and his bandit friends, players still have to enter another dungeon for the final test. Compared to the sewers, the cellar exit will be easier to quickly move to town to replenish supplies, the player will also be able to reach the arena faster to kill Jeremy and prepare to enter Boogie’s crypt, reducing the chance of overturning. The secret room is another topic worth mentioning. In the secret room in the first chapter, although the room is set up to be full of comedic effect, there is a treasure chest with a few bottles of wine and a fire silk, it’s a nice surprise that rewards you for buying the key in the previous dungeon.
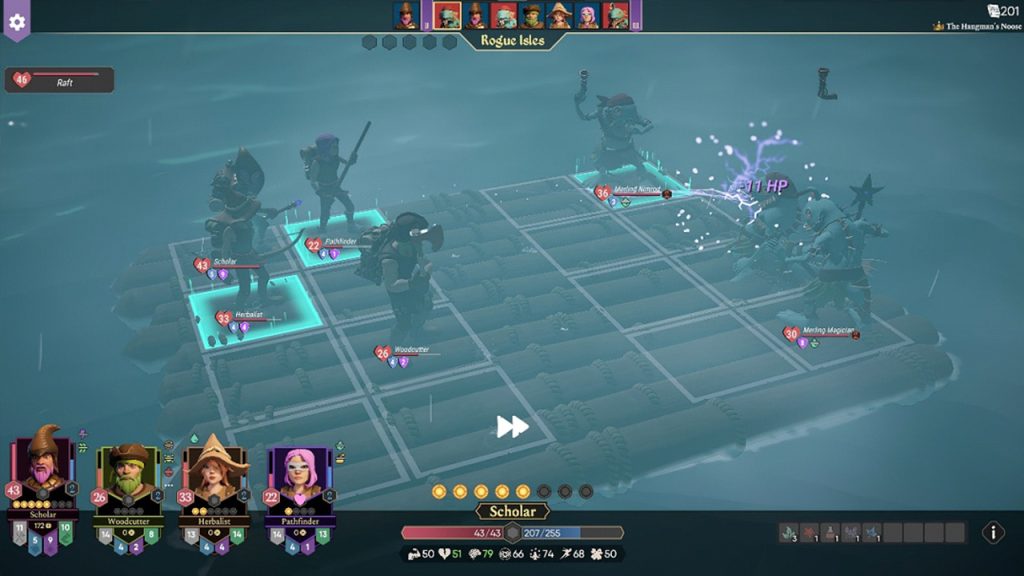
Chapter 2 — With the introduction of a new chaos mechanic, the unique Rush feature from ftk 2 is on full display in this chapter. Although the player is still required to keep an eye on the chaos increase in the timeline, the chaos in this chapter does the opposite, each time a chaos is activated, the chaos gauge will be reduced by one slot, when the chaos is reduced to zero, the game will end. Therefore, the chaos grid in this chapter is equivalent to a health gauge, and all players need to do is to replenish their health in time to slow down the rate of health reduction. The map in Chapter 2 will be significantly larger than in the previous chapter, so IOG has introduced a completely new mechanic in this chapter, the Landboat. The landboat can carry all the characters in the party, allowing them to move together, greatly improving the movement efficiency, but the disadvantage is that once the characters are on the landship, some passive skills that could be triggered during the walk or after the end of the round will enter stop working, players need to pay attention to whether a character with those kind of skills is on the ship before ending the round. In addition, another gameplay system inherited from ftk will also make its debut in Chapter 2 – the scourge system.
There are twelve scourges in ftk, only five scourges were brought back in ftk 2: the Disciple, the Hangman, the Foul priestess, the Bandit king, and Lucky. As a sequel, two new scourges have joined the team, the Graveborn and the Bog drinker. Of the seven scourges of ftk 2, the Hangman requires the player to clear the fourth chapter before he has a chance to encounter him in the next game. After talking about these basic situations, let’s talk about the performance of the scourge system in this game:
- Scourge bases are generally very far away from the current location of the player’s team, and there are no options to slow down the Scourges in advance in ftk 2, so the first Scourge encountered at the beginning of the game has a great impact. If it’s the Graveborn or the Bandit king, players can either face the pressure and try to defeat them or simply give up and restart. The powerful negative effect of bringing the enemy back to life has made players’ first impression of the Graveborn extremely negative in any situation, and the Bandit King, who stuns several characters on the player’s team at the beginning of the fight isn’t much easier. These two above are the two scourges with the most negative reviews from players, and the reasons why other scourges are not much better are in comparison.
- The equipment dropped by Scourges is not proportional to the difficulty of the battle. In the case of the Bog Drinker’s hat, which only has four health regeneration and poison immunity, the basic bonuses of evasion, critical strike chance, damage bonus, attack bonus, and gold bonus are also present in other common hats, which raises the question: what is unique about Scourge’s hats that make the player choose them instead of choosing a hat that does better with these bonuses? Because of continuous loot gathering in the game, the hat needs to ensure that even in the later stages of the chapter, it can still exert its own value. In this case, sustainability comes into play, and giving damage bonuses to specific enemies is the best way to implement sustainability.

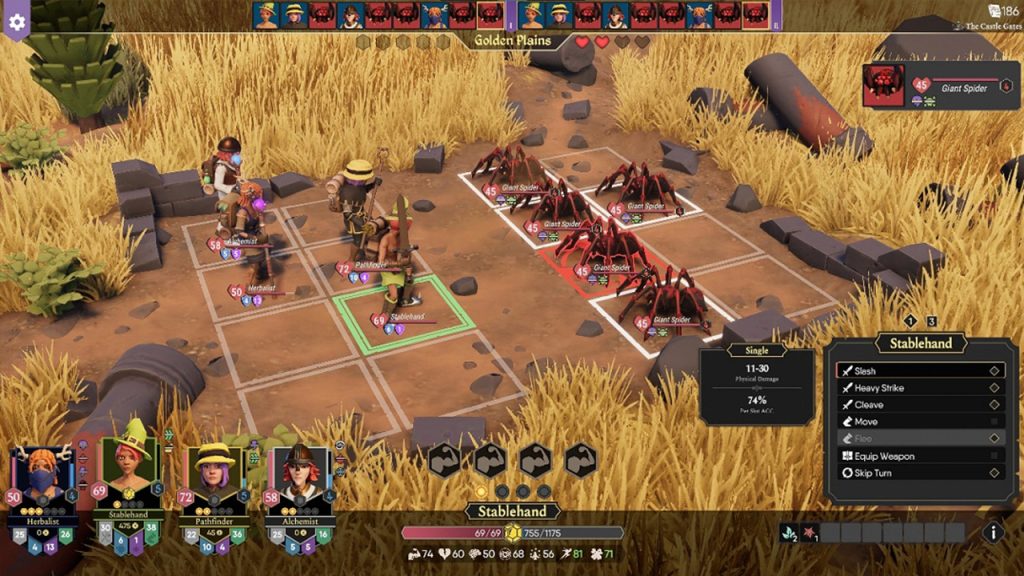
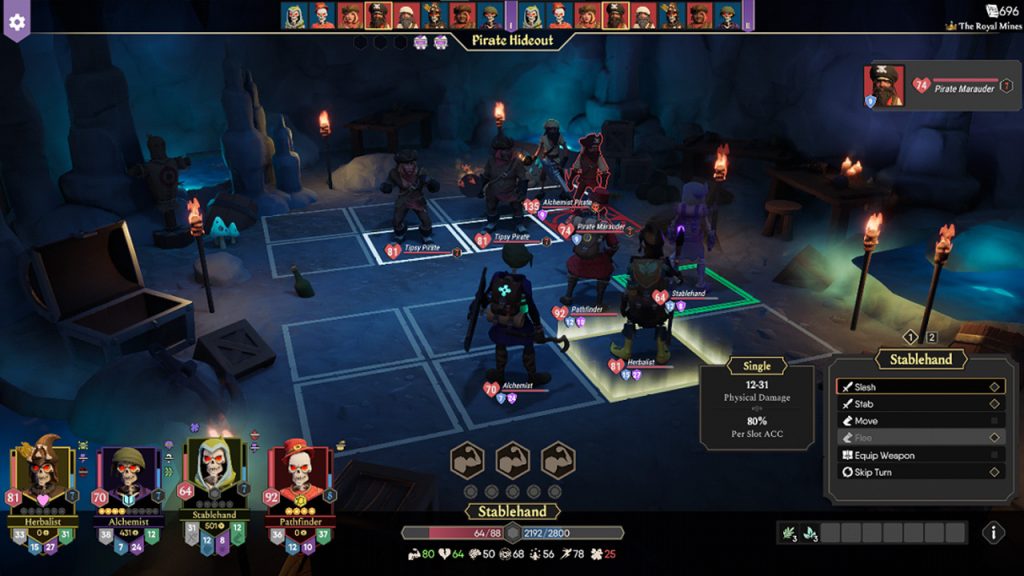
Siege is a major feature of Chapter 2. The classic setting of the frost adventure in ftk is recreated in Chapter 2 as as the player must fight several waves of goblins in three towns scattered across the map. The player is required to defeat these sieges in order to gain access the town’s Market, Services, Quests and Mercenary Systems. In this nine-round waves of battles, players will face off against the same kind of enemies: Goblin rangers, Goblin Tricksters, and Goblin scrappers. Due to the frequent appearance of goblin-type enemies (Dark Caves) in subsequent chapters, and the fact that this chapter focuses on goblin-type enemies (other goblins can be found in the large map – Goblin fighters, Goblin wizards and Goblin elites), the novelty of goblin enemies will quickly fade to the later stages, and the player may even get bored of them. Fortunately, after many novelties in the second chapter, more types of enemies have been added to the larger world for players to encounter on the road.
The best way to grow on the road is to find different mini-dungeons for two or three battles, and along the way to open a treasure chest hidden in it or find a Goblin Merchant who lives in it for a special sale. Since the geomorphological structure of Chapter 2 begins with the autumn forest, the savannah is the undertaking, and the three foothills are combined with a swamp and a burning forest, so if you want to experience a blind box dungeon adventure without running around, the savannah is the best place to go. The mini-dungeon that comes with the foothills is a spider cave by default, so IOG has specially set up a hidden spider cave that can only be discovered by side quests for players to enjoy. This spider cave will have two waves of enemies to warm up, followed by a mini-boss fight, which is a bit repetitive and less fun due to the fact that the spider type enemies are currently being expanded on.
Chapter 3 — As the chapter begins, a new way to play is to destroy minecarts before they reach their destination port to gain experience and even equipment. But before the mystery is revealed, the game takes a different approach: the first town spawn will take place in the third round, which not only means that the price of herbs and services will increase, but also the level of enemies in the novice village. No matter what difficulty the player plays, it does not change the established fact that the enemy level go from zero to one after three rounds. The initial area also ushered in the first terrain change, changing from the autumn forest to the foothills, so the fixed maximum number of steps was reduced by one step. In addition, Chapter 3 is the first attempt at a single town in the Starter Village area, which is a sign that the difficulty of the game will be further increased in Chapter 3:
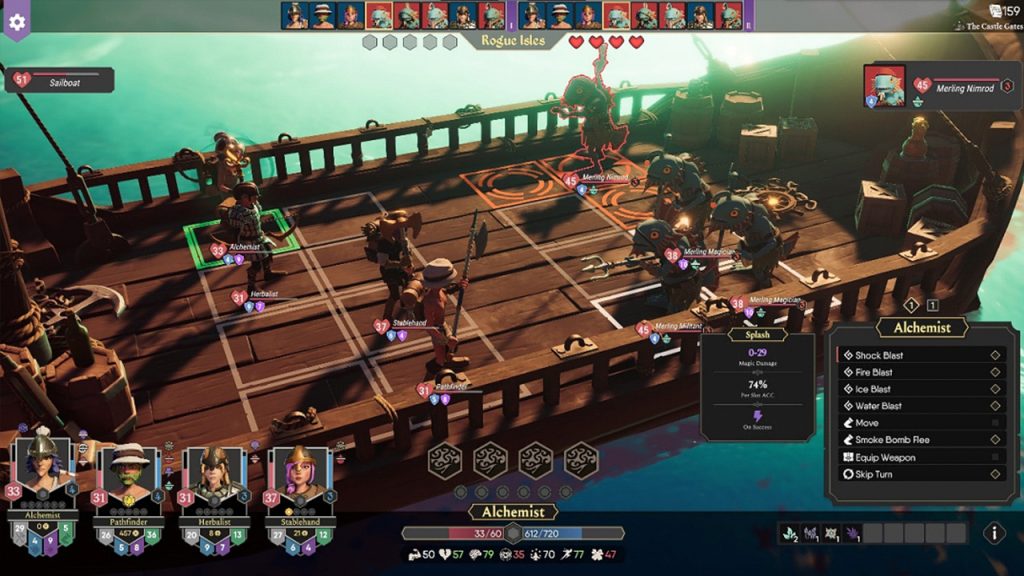
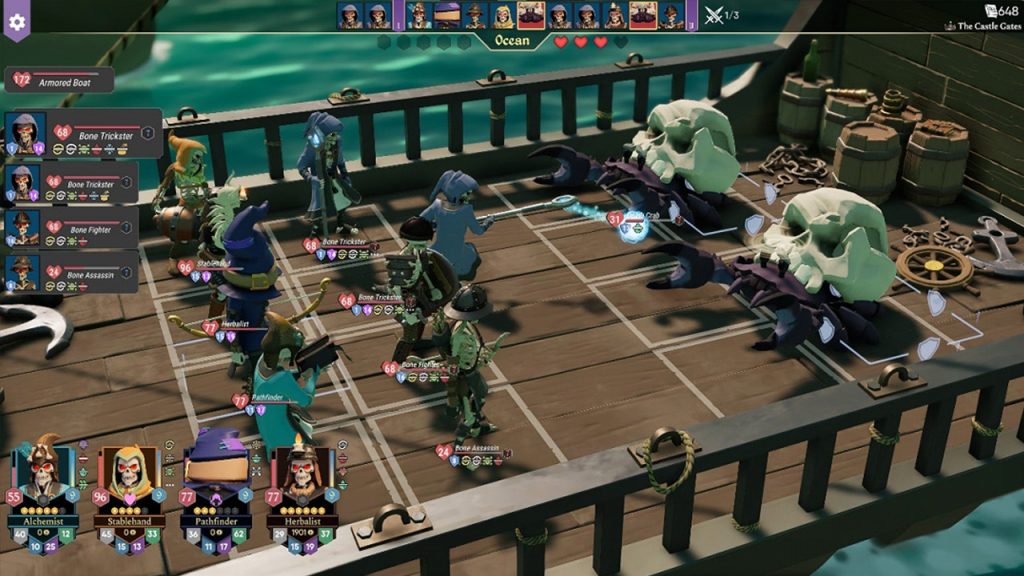
1. The merling-type enemy appears for the first time, and the three merlings, the Spearman, the Musketeer, and the Mage, make a significant contribution to the new taste of the chapter. Because the familiar enemy type of merling is closely related to the deep underwater map in ftk, the game requires players to buy a boat to cross the sea to another island from this chapter. On the way across the sea, not only are there various enemy ships floating on the sea waiting for the players to fight, but there is also another hidden danger -kraken. However, since the gameplay of the Royal Mines is still based on a large area of land, the maritime part is not taken seriously.
2. The core gameplay of this chapter lacks beginner guidance, so players may get stuck knowing that the main quest is to destroy the minecarts that are constantly spawning, but not knowing where to start. The search for explosive kegs is a required action throughout the chapter, the players can obtain kegs by obtaining keys to unlock pirate caves(killing slippery pirates, unlocking pirate caves, and entering to clear enemies) and by detecting mounds of dirt. Suspicious mounds can be found all over the island, so splitting up your team is the key to improving the efficiency of mapping. However, the number of steps that can be walked is greatly affected by the topography, so it is the premise to improve the efficiency of map development by purchasing landboats as soon as possible to increase the number of steps characters can take. To achieve this premise, the team’s characters need to accumulate enough equipment, through fast movement and multiple battles in the early stages, so the Pathfinder’s passive skill, survey is used to the greatest extent in this chapter.
3. The random location of the Slippery pirate and the Silver snake makes the process of finding the key a bit tough. Due to geographical limitations, the Silver snake would be more difficult to find than pirates, and the lack of armor-piercing weapons made this process even more difficult. These two special enemies tend not to appear for a full round, and with the maximum number of steps in the terrain and the occasional rainy day, it is just hard to bring a character with an armor-piercing weapon at the right time. This is especially true on Master difficulty: with multi-threaded tasks, the limited time forces players to construct a sequential plan for what to do and which is the most urgent, so how to quickly travel between different landscapes becomes the biggest challenge. Fortunately, the portals in the game are all within a five-block radius of the town, and if you add the assistance of the Pathfinder survey, the pressure on the players can be slightly reduced.
4. The timing of the minecart’s destruction and the number of steps the character can take must be calculated based on the information known in the game, otherwise the hard-earned explosive kegs will be wasted. The main structure of this chapter is the minecart with a normal minecart that moves four hexes per movement and a fast minecart that moves six hexes per movement, and the treasure minecart interspersed with it plays the role of surprise reward to the player. In order to destroy a minecart, it is necessary to place a keg within the hex where it will move to, so that the cart can detonate the keg. The Explosive Keg has a four-turn countdown and at the start of each round, the game counts the Explosive Keg first and then the Minecart, so it is not feasible for the Explosive Keg to self-detonate to destroy the Minecart. Later in the game, at the end of the map, powder kegs can only be obtained through the Pirate Caves. One of the gem challenges in this chapter is to destroy three treasure minecarts, and if you add high frequency of minecart spawns when powder kegs are in short supply in the later stages, the pressure of the game can be imagined. IOG has made a heartwarming little mechanic about this: the chaos frequency will be slowed down at nearly 50 turns to reduce the time pressure on players, so that they can complete the unfinished things as soon as possible and enter the final dungeon to complete the final part.
Chapter 4 — The foothills is still the first terrain, there is an extra town compared to the starter village in Chapter 3, so there are more tasks and things to do here. In addition to the side quest tips mentioned in the first chapter, there is another option to increase your team’s damage — the Mercenary system. This is a new way to play that IOG has high hopes for, IOG says that it is excited to see how players will use the system. In fact, the system cannot be said to be worthless, only to be of little value.
- The Mercenary system was added to ftk 2 as a new option, and was half unlocked by default, and half was required to be unlocked by playing different chapters. The mercenaries unlocked in the lore store will randomly appear in different towns, matching their own level according to the latest town refresh round, so there may be a gap between the mercenary level and the player’s team level, coupled with the high price and very short effective time of the mercenaries themselves, all kinds of factors that make the existence of mercenaries meaningless. Because of that, the mercenary system does not live up to its potential well enough to be implemented in the players strategies.
- Regardless of whether it is the default or unlocked mercenaries, when it comes to the use of firearms, they will have the problem of limited target selection. Due to the change in the combat system in ftk 2, the priority enemy targets will also be different. Some enemies will have high armor, and if the enemy is not in a T-shape, the target will turn and aim at an empty space. Firearms all have splash damage and AI-controlled mercenaries will only choose one of the four squares in the middle two rows randomly, which reduces the power of firearms greatly.
- Since mercenaries’ weapons all have multiple skills, it is inevitable that mercenaries will use the weapon’s extra skills instead of their main attack skill. This is where the question of probability comes into play — The mercenaries use their extra skills frequently, even if the enemy in question is immune to the negative effects of that skill, AI mercenaries aren’t smart enough to avoid committing those mistakes frequently. This also affects the damage output — humans are always more flexible than the way the AI thinks, and players can’t predict whether the AI will use extra skills and held them back at critical moments, so hiring mercenaries is a gambling game.
- The mercenary’s HP problem is even more severe compared to the Skeleton Squad in the Summons. The mercenary’s employment is a one-time cost, if the mercenary dies honorably within the contract period, or if the mercenary happens to use the extra skill frequently, then the benefit of the money spent will be pitifully low, this will happen a lot in game. Although three rolls are needed for the Dark Tome to summon skeletons infinitely, but the level of the skeletons will not only follow the level of the character that summoned them, but also it doesn’t matter if a skeleton dies, you can just summon a new skeleton to take over right away. This process may need a bit focus, the character’s intelligence is high enough (above 80) the rate of success will be higher.
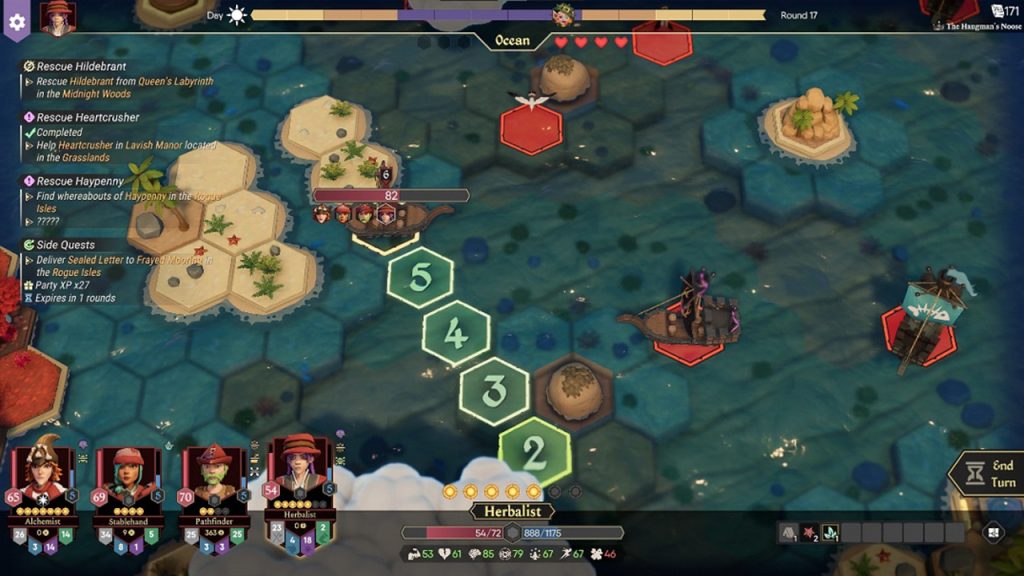
A new set of gameplay mechanics is available for players to explore in Chapter 4, if you’re a fan of dungeon crawler in ftk like me, the gameplay makes the transition the smoothest gameplay here. The main quest is divided into branches, each with its own steps for the first time and the goal for players is to decide the order in which they want to complete the different branches, in order to complete all the main quests one by one by following the steps in each path. At the same time, the chaos mechanic has been replaced with five Resistance leaders, if the leader is not rescued before the deadline, the leader will be executed, and the opportunity to complete the achievement of rescuing all the leaders in the game will be lost, you will need to go back to play Chapter 4 later. In the process of rescuing the leaders, the main quest will lead the player to different locations and allow the player to explore the area easily, and when a leader is rescued, the execution of subsequent leaders will be greatly delayed. This not only allows players to explore a certain areas purposefully, but also allows players to reveal more secrets hidden in the area at their own pace without restrictions, forming a situation where the early stage is tight but the later stage is loose, first bitter and then sweet.
The time gained by rescuing a leader and postponing execution can also lead to another adventure I’ve been looking forward to the most — into the deep. As a key part of the game’s enlightenment and familiarization with maritime events, Chapter 4 gives players the freedom to choose by allowing them to sail and explore the seas most of the time, engage enemy ships, pick up random sea events, light a kraken ward they encounter on the way, or enter a sea cave to pick up treasure chests they just discovered. It should be noted that you may be attacked by the kraken during the long journey, and this is a new story.
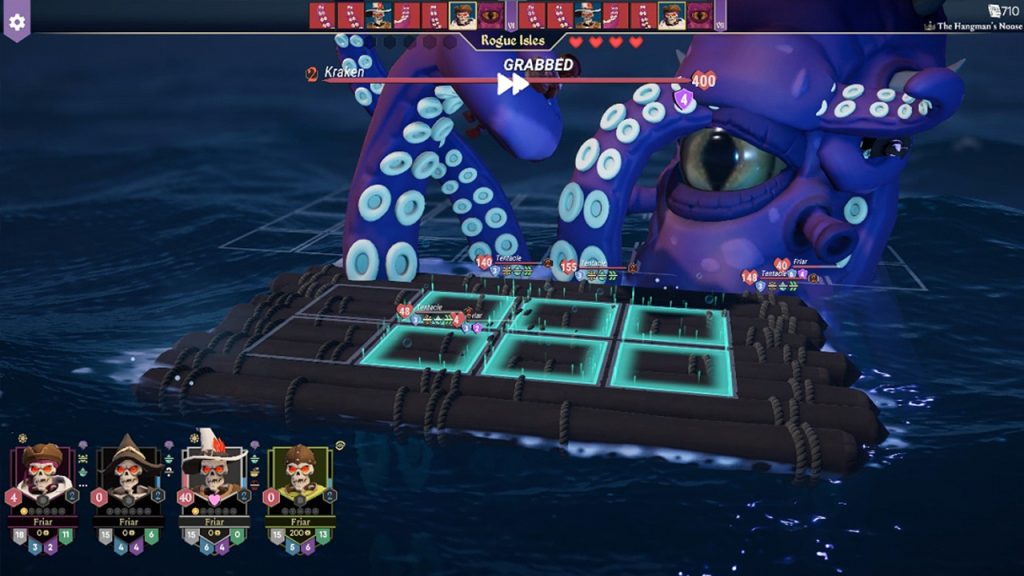
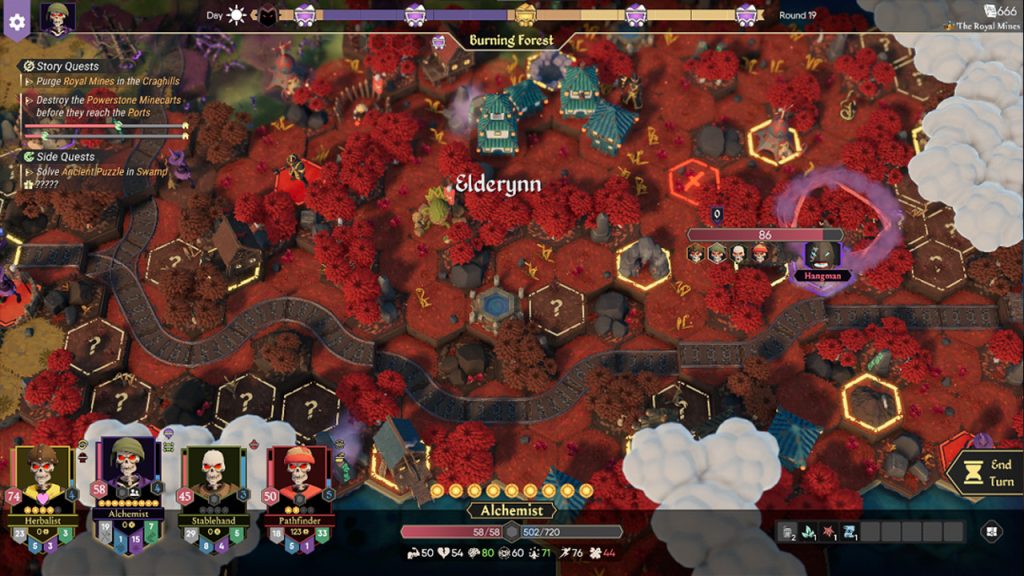
The Kraken was once talked about by players for its outstanding ship-breaking ability and terrifying damage, IOG lived up to the expectations to continue its reputation in ftk 2. Four long tentacles squirm and are ready to deliver a heavy blow to the player’s team or grab one of their characters incapacitating them— yes, it’s a new move that the Kraken has developed over the years of battling the player. Of course, it only takes one turn to attack the tentacle that grabbed the character, and the trapped character can return to the party to continue the fight, but the possibility of being grabbed again cannot be ruled out. In addition to grabbing team members, raising huge waves and shooting straight at the characters to stun them, its also a new skill the kraken learnt. One thing that differs from ftk is the area where the kraken appears. The possibility of encountering a kraken before reaching an island town adds to the uncertainty of each adventure, players can’t guarantee that the kraken will appear on the way to the town when the party needs to rest and regain health and focus, or when the herbs are out of need to go to the town to get a boost, so a useful trick from ftk will still be useful in ftk 2: stay on shallow waters and drive near enemy ships. Due to a comprehensive upgrade in the art style of ftk 2, it has become possible to more intuitively determine whether there is a kraken in the sea area by the depth of the seabed. Since the mini-dungeons for each type of landscape are still undeveloped, Chapter 4 still lacks a lot of fun exploring the dungeons. Only six can be experienced in Chapter 4 due to the limitations of the story, they include: the Foothills, the Rogue isles, the Grasslands, the Burning Forest, and the Midnight wood, more appearances need to be experienced in Chapter 5.
Chapter 5 — As the final chapter, Chapter 5 will be richer than the first four chapters, but IOG has chosen to present it in a way that makes it less effective. The beginning of the chapter returns to the old process of starting with the Autumn Forest and then entering the grasslands, where players are faced with a choice of five options after completing the main quest in the grasslands, with five options corresponding to five plans, and five plans corresponding to the leader rescued in Chapter 4. If players missed a leader in Chapter 4 having let that leader be executed, they will not be able to choose that leaders’ plan. The solution is simple, replay Chapter 4 and rescue the leader — this will not affect the existence of other plans, as long as they are saved once, they will always work. Let’s take a look at each of the five initiatives and their corresponding impacts:
1. Hepenney’s plan
The plan meant that players would have to make their way through a seven-floor dungeon, four of which were sewers, and three were dungeons from other chapters, including taverns, the oak and guardhouses. Players will have to fight two battles when passing through the sewers, and one battle each for the other scenario, for a total of eleven battles. In the course of these eleven battles, players can only rely on their own supplies to regain their health and focus, and when players rush out of the sewers after their ordeal, they are greeted by layers of guards in the Queen’s Castle – this is not only a double test of patience and energy, but also a huge challenge to the players’ inventory of herbs. Choosing this plan means that you need to play sixteen combats in a row without any supplies along the way, so even though the sewers are only level five, this plan is quite difficult without going through the full team level and inventory.
2. Heartcrusher’s plan
The plan requires the player to travel to and clear a sea cave to collect crab shells, and then rush to the Golden Plains to find a skeleton to collect bones. These two missions can be said to be easy, because the Crab Cave is only level zero, and the graveyard is marked as level 5 but in fact there is no need to fight, just click to skip a few dialogues, the location of these two missions is intended to lead the player to explore the entire map. After completing these missions and claiming the War Machine, players will be asked to clear the barrels of explosives placed in the path that the War Machine will pass through. Unlike the explosive barrels in Episode 3, this time the players need to pass the judgment to destroy the barrels. It takes thirteen rounds for the Gears of War to travel from the port to the castle gates, the players can buy more free time by clearing the explosive barrels along the way in advance. Gears of War reduces the number of enemies you need to defeat before entering the castle by two rounds, meaning that you only need to fight three waves to enter the castle and face the layers of guards.
3. Mooney’s plan
The plan is closely tied to three mini-dungeons with Chaos Devices, meaning players have three more chances to reduce Chaos. The three dungeons are also located in different terrains to lead players through the map. Other than that, the process is no different from Hilde’s plan.
4. Pinecone’s plan
Arguably the longest and most travel involved, the plan requires players to go to the Midnight Forest to clear a dungeon to get the portal’s energy, and then head to the Burning Forest to activate the portal. The Burning Forest is the innermost area in the northwest corner of the map, so the player will pass through most of the map on their way to this destination, revealing most of the different biomes in the map. Once the portal is activated, players will not be immediately teleported to the Queen’s Castle but will first have to go through ten rounds of skeletons and ghosts attacking the portal. The player will need to guard the portal – the portal will give the player ten chances to make mistakes. Then the player must enter the lava cavern in Purgatory and defeat the Broken Bone to get a follower, and finally enter the Queen’s Castle to start breaking through the Queen’s guards.
5. Hildebrandt’s plan
This plan is the simplest of all plans, with no guidance, only the ultimate goal. Players will need to explore the entire map to reveal more faces, find four secret missions hidden in four landscapes, summon the help of the inhabitants of Fharul to reduce the difficulty of the duel with the guards in the Queen’s Castle. The four secret missions are Boogie’s crypt in the swamp (which is also home to the secret room in Chapter 5), the seaman cave on the Wanderer Island, the Chaos Jelly in the Burning Forest, and the trolls in the foothills. Once completed, players will receive assistance and damage bonuses/debuff bonuses for their first four battles in the castle, as well as Followers Synergy. These four boosts can be obtained by exploring the whole map in any plan, the route of exploration is constant due to the fixed location of the landscape, and the randomness is only reflected in the different locations of towns, shrines, hero statues, and portals in some of the landscapes in each game, so these five plans do not make much material difference in the rule changes.
In the final showdown with the Queen, the number of squares on the player’s side has been expanded to 12, so the strategy of using a shield in the front row to protect the back row will be affected by more random positions at the beginning. Although explosive shot of the cannon and summoning of the Dark tome have been increased from one roll to three rolls, they are still powerful abilities against the Queen’s Soldiers, Queen’s Archers, and Queen’s Mages. After defeating four archers, two soldiers and two mages, the queen will step down from her throne and fight the player with an 800 health in default. Like ftk, Her Majesty will have her own Chaos retinue – two Chaos Beasts and two Chaos Wolves. Defeating the Queen will not end the battle, and Chaos Minions will continue to engage the player until all enemies are defeated. At this point, the full content of the second generation has been revealed in front of the players’ eyes, and the production team list will be played after the end of the fifth chapter to announce the victory of the players.
Thanks for reading!