
Welcome to the exciting world of Palworld modding! Whether you’re a seasoned gamer or new to the modding scene, this guide is your ultimate companion for enhancing your Palworld experience. Here, we provide detailed, step-by-step instructions on how to install mods for Palworld, ensuring a seamless and enjoyable gaming adventure.
Understanding Palworld Mods
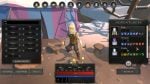
Before diving into the installation process, it’s important to understand what Palworld mods are. Mods, short for modifications, are custom changes or additions to the game, created by the community. They can range from simple tweaks to complete overhauls, enhancing gameplay, graphics, or adding new content.
Preparing For Installation
System Requirements:
Ensure your system meets the requirements for running Palworld and its mods. This includes having a stable internet connection and sufficient storage space.
Game Backup:
Always back up your game files before installing any mods. This precaution helps you revert to the original state in case of any issues.
Mod Source Verification:
Download mods only from reputable sources to avoid potential security risks. Popular platforms include Curseforge and the Steam Workshop.
Step-by-Step Mod Installation
1. Choosing and Downloading Mods
Start by selecting the mods you want to install. Consider compatibility with your game version and other mods you might have. Once chosen, download the mod files, usually in .zip or .rar format.
2. Extracting Files
Use a file extraction program like WinRAR or 7-Zip to extract the downloaded files. Ensure you know the extraction location, as you’ll need to access these files later.
3. Locating the Palworld Directory
Navigate to the directory where Palworld is installed on your computer. This is typically found in your Steam library under Steam/steamapps/common/Palworld.
4. Copying Mod Files
Copy the extracted mod files into the relevant folder within the Palworld directory. The specific folder depends on the mod’s instructions—some mods require placing files in the Mods folder, while others might need to be in the Data or Textures folder.
5. Mod Management Tools (Optional)
For ease of managing multiple mods, consider using a mod management tool like Vortex. These tools help in organizing, installing, and updating mods efficiently.
6. Game Launch and Mod Activation
After copying the mod files, launch Palworld. Some mods are automatically activated upon game start, while others might require activation through the game’s mod menu or an external mod manager.
Testing And Troubleshooting
- Testing: After installation, test the game to ensure the mod is working correctly. Look for any changes or enhancements the mod was supposed to introduce.
- Troubleshooting: If you encounter issues, check the mod’s documentation for any known conflicts or special instructions. If problems persist, consider reaching out to the mod’s creator or community forums for support.
Safety And Best Practices
- Regular Updates: Keep both the game and mods updated. Mods may need updates to stay compatible with the latest version of Palworld.
- Mod Compatibility: Be aware of mod compatibility, especially when using multiple mods. Incompatible mods can cause crashes or bugs.
- Community Engagement: Engage with the Palworld modding community for tips, recommendations, and support. Community forums and social media groups are great places to start.
Conclusion
Modding can significantly enhance your Palworld experience, offering new challenges, improved graphics, and fresh content. By following these steps and recommendations, you’re well on your way to a customized and thrilling Palworld adventure. Happy modding!